Harvesting Tips

Harvesting Tips used in North America and other harvesting advice.  (For Case IH combines)

-230 Series Flagship Combine Residue Spreading:  Some folks may not know this, but you can get a wider residue spread behind a 230 series Flagship combine.  Follow the tip in the picture below.  Adjustment can be made to raise the whale tail assembly closer to the spreader fans.  Making the adjustment will give you about 3 to 4 more feet of spread.  The factory position is usually good for up to 35 foot head.  However, I like to move the assembly closer for 40 foot plus size heads.   Also, remember you can adjust the whales tail fore and aft to balance your residue inside the wheel tracks verses outside the wheel tracks.
spread tipresidue spread pic

-Automatic Header Height Control recommendations:    The following steps are recommended to ensure the AHHC works at its best.
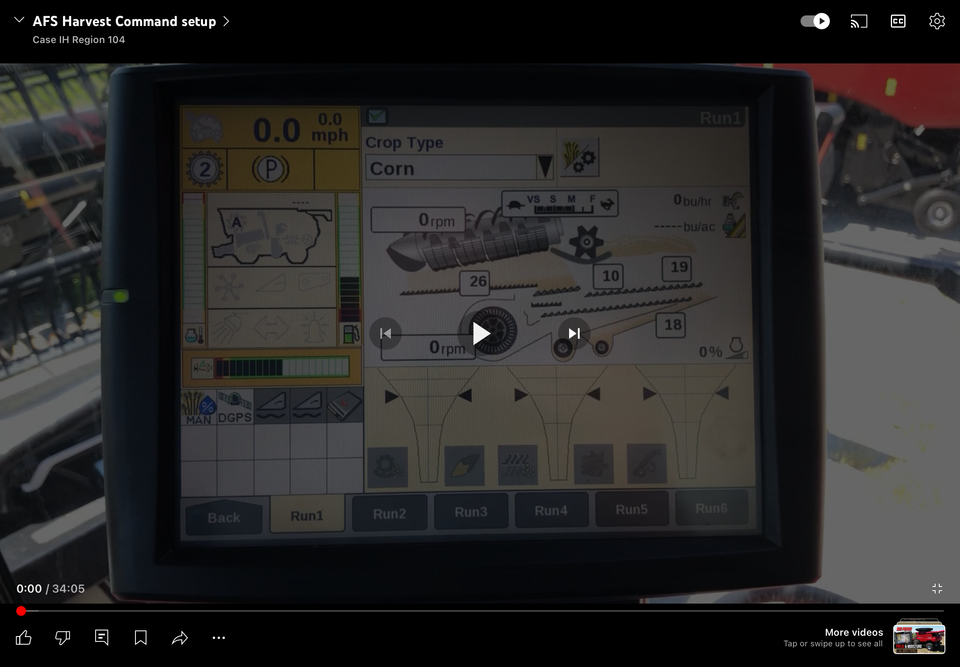
*First step after plugging into the header is to double check your feeder, Head 1, and Head 2 screens.  Here is a cheat sheet for setting up the Head 1 and Head 2 screens for a Flagship combine.  Click one time on this link:  Combine setup screens.  Some items are similar in the midrange combines.  Make sure the Head 1 and Head 2 screens have the correct information in them for the head you have installed (these items are under the toolbox menu).  Attachment.
*Second Step is to perform a header calibration.  If you have never done a header calibration, here are a couple of short videos that explains it.  Also, see operators manual.  Video for Midrange combine header calibration Link: https://www.youtube.com/watch?v=VdIWM30-ceQ   Video for Flagship Header Calibration link:  https://www.youtube.com/watch?v=fKcmCUHM8Ys
*Third Step is to set your Ground set points.  This involves setting a ground set point for rocker switch position 1, setting a ground set point for rocker switch position 2, and setting a position for Head land turn height (also known as maximum working height).   You will use the “Resume” button to cycle between to ground set points.  It is recommended that you use the “Shift + Resume” buttons to raise the head on the headland.  Here is a video link to show you how to set the 3 different set points:  https://www.youtube.com/watch?v=xk1z6BwireA

Threshing Green Pod Soybeans:  Green immature rubber pods can be hard to thresh.  One of the tricks to use, is put a small wire concave in the front (wheat concave).   On a MidRange combine, we put a wheat concave in the very front followed by the two large wire concaves.  On a Flagship combine, we put one in the very right front, with the other concaves being large wires.  The reason this helps is that a wheat concave has a lot more wires and rub bars to aid in threshing.  It is also recommended to make sure your concave assembly is level to your rotor, and make sure your pinch point is set to the right point.

Suggested Operating tips for 3162 head:
-When doing a header calibration, be sure to tilt the header at least to the middle position (the big got on the tilt gauge).  This will insure that you can get the full travel of the sensors and their linkage.  Note:  some folks will tilt the header all the way back for transport on a header cart.  If you do a header calibration in the tilted back range, you will not get full travel for your automatic header height control to function correctly.
-When coming to the headland, I would suggest that you do not raise the head right away after the crop ends. Drive an extra 5 feet before raising the head to allow the reels to sweep material up to the belt. The cutter bar is similar to a auger header as it will drop down when you raise. To avoid losing some plants off the front, just drive the extra 5 feet before raising and they will be swept in.
-The angle of the head can be tilted from the cab by using “Shift + Reel fore/aft”. There is a Tilt gauge on the head. Start out in the middle with the indicator arrow on the center large dot (hole), and make slight adjustments from there.   It is also recommended to have the feeder face plate in the middle of the slots for best overall performance and sensor range ability.
-In very short crops, I will usually move the reel to a rear position (like number 8 on the reel side indicator), and then lower it all the way down. This way the reel fingers can do a better job of sweeping plant material up the stainless steel flex sheets up onto the draper belt.

-4400/4200 Corn head Tall Corn Kits:  Question:  Is there a Tall Corn kit for the 4200/4400 series corn heads?  Answer: Yes, A option for Tall Corn deflector is available in a fixed steel plate configuration.   The kit is PN 47377859 can be used on all rigid heads with or without auger dividers. It will not work on folding heads. Hand operated fasteners are used to attach the tall plates to the mounting bracket so they can be removed when they are not needed.

-Automatic Crop Settings:  If you would like to learn how to more effectively used the automatic crop settings feature, we have placed a couple of short instructional videos on the website for you.  They are at the following links:
This one is for the Flagship combines:
http://caseihharvesting.com/instructional-video-automatic-crop-settings-for-flagship-combine
This one is for the Midrange 130 and 140 series combines:
http://caseihharvesting.com/instructional-video-automatic-crop-settings-midrange-combine-130-and-140-series

-Residue Deflector (Whales tail) QuestionQuestion:  I have a 8230 combine.  I have been combining wheat, and notice that I have a lot more residue and chaff directly behind the combine inside the wheel tracks.  Is there a way to get more residue material to spread to the outside?  Answer:  Yes,  You probably need to adjust the deflector “Whales Tail”.  You most likely have it set with a wide gap, and most of the material is escaping between the wheel tracks.  Go ahead and reduce the gap to get more material to spread outside the wheel track.
Whalestail

-Boundary Ability:  One of the really informative features that you can set up on one of your “run” screens is the Boundary Information.  Once you have “recorded” the outside boundary of your field, you will have information on the following items:  How many acres are left, estimate on how many bushels are left in the field,  estimate on how long it will take to finish the field.  This may help you plan you trucking operation.  For example, if you know how many bushels are remaining in the field, you can plan how many trucks you will need.   These items can be placed on one of your run screens.  Simple go to the toolbox, and then to the “layout” tab.  Here is example of how it might look.Boundary

-Pounds and Bushel Counter Reset:   We have a nice feature available on the Pro 600/700 monitor.  You can put on one of your run screens (using toolbox and layout tab) a “Weight Counter*” or a “Bushel Counter*” or BOTH.  All you have to do is tap the screen and the items can reset to “0”.  These two items with the little star (*) figure, allow you to reset both pounds and bushels if you like.  This is nice if you want to measure how many pounds are in a hopper, or combine until you have enough pounds to fill a truck. You can even find out how many bushes are harvested in one round of the field.  It has some extended features that the others don’t have.  Check it out!

-“How To” on Variety Tracking:  We now have TWO ways to process planting and combine monitor data.  In other words, we have two desktop software packages available.  One is the “AFS Desktop”.  The other is called “AFS Office”.   Case IH dealers have a new step by step product information bulletin on how to use and process Variety Tracking.   It will show the step by step for the AFS Desktop software, and it also show the step by step for the AFS Office Software.

-Drought Setting thoughts for Axial Flow Combines AND Corn Head setting check list:  Check out the new post under the “Settings” section (under categories) of this web site.  I have posted some thoughts for the varible harvest we may encounter this fall.  http://caseihharvesting.com/drought-setting-thoughts-for-axial-flow-and-corn-head-setting-check-list

-Pro700 Camera Question: I have a Axial Flow combine with the New Pro700 monitor.  What do I need, and How do I install a camera system?  Answer:  Installing cameras in a combine is not very hard.  You can install 1 camera or up to 3 cameras.   You will need ZAE31200043 adapter harness, Extension harness length of your choice, and the camera(s).   The Adapter harness will come with the installation instructions.  It will walk you through how to install.   There are 130/131 degree angle cameras and 150 degree angle cameras.  See your Case IH deale for Camera information.

-Pro700 Retrofit Question:  I have a 20 series combine with a Pro600 monitor.  I would like to upgrade to the NEW Pro700.  Can this be done?  Answer:  Yes, However, The mount is different between the 600 & 700 so an additional mounting bracket is needed.  Kit Number 84531089 is required. A technician will also need to upload new firmware using the Case IH dealer’s Electronic Service Tool.

-Combine Class Sizes:  For 2012 and forward, the AEM (Ag Equipment Manufacturers) have designated new horsepower classifications for combines.  Combine class is based on horsepower only.  Here are the classifications:

Class I to VI:  0 to 322 HP
Class VII:  323 to 403 HP
Class VIII:  404 to 484 HP
Class IX:  485+ HP

-Steering Stop bolt positions (Sometimes Overlooked):  Be sure that the steering stops bolts are adjusted.  The factory send the combines out with the max stop bolt dimension.  What determines the stop bolt adjustment is dependent on steering tire size, the height position, and the tread width position.  If you are not quite sure your steering angles are right, double check it with the recommendations listed with the tire charts in the operators manual.  The charts will tell you the length to set the steering stop bolt.  This should be adjusted to get the best turning radius based on tire and tread/height settings.

-Tall Corn Side Shields for 2600 Chopping heads:  Question:  Is there a tall corn side shield kit for 2600 chopping corn heads?   Answer: Yes there is.  It is Tall Corn Attachment P/N 84287014.  It can be used with the hyd. powered  spiral end dividers.  It can be in the raised position for standing (tall) corn and lower it for down corn. The tall corn attachment should effectively save a good number of those low retention variety ears.

-20 series combine with chopping head:  I have a chopping cornhead on a 20 series combine.  The engine has good power when I first start out, but seems to lose power after the first round in the field.  There are no warning codes that pop up.  Can you explain power loss?   Answer:  The combine engine is most likely “De-Rating” itself due to excessive heat build in the air intake air.  The cause is likely that the rotary air screen holes are plugged and not letting enough air through the air box cooling and air to air exchanger.    Chopping heads will tend to put a sugar mist in the air.  This sticky mist will mix with the dust material and will eventually make the holes in the rotary air screen grow shut.   The screen will not be covered with leaves, but the holes will grow smaller which reduces the air flow.  The 20 series engine will protect itself and will “DeRate”.   In case you do not know, there is a Rotating Air Screen Brush that can be installed inside the rotary air screen.  It will activate everytime you unload for about a minute and a half.  This stiff brittle brush will come down and basically poke the holes clean around the circumference of the rotary air screen (It goes on the inside).  If you would like to add, the kit part number is 712209.   The “sugar mist” effect starts going away once the stalks mature and get good and dry.

-Notes on  Corn head settings in general:  I want to do the best job I can with some of the dry corn this year.  Do you have suggestions for Corn Head Settings?  1.  Make sure the head is running approximately 23 degrees in cutting position.  The angle can be measured on the stripper plates (use a angle finder).  If you run to flat angle, you will increase the amount of leaf material into the combine.  If you run to steep, kernel loss counts will be higher due to gravity.  2.  Gathering chains can be run with a staggered pattern or a timed pattern.  A staggered pattern will pick cleaner and might be useful in green sticky leaves.  Running a timed pattern will pick dirtier, but will save a few kernels as the leaves will act as a broom to sweep kernels up into the head.  Use this, if the leaves a very dry and kernels are dry.  3.  Check your stripper plate dimensions.  The opening gap should be 1/8 inch wider at the back of the stripper plates, verses the front.  The fixed side of the stripper plates have slots for adjustment ( I use sockets that have outside dimensions that are 1/8 inch different, as measuring tools).  4.  Know how to adjust your hydraulic deck plates.  Tighten the deck plates until you see excessive material and upper stalk coming in, then, back your setting off a little.  5.  Run the right corn head speed in relation to your ground speed.  The ears should snap on the stripper plates between ½ way and ¾ of the way up the deck plate as you observe from the cab.  Adjust corn head speeds accordingly.  6.  This is a personal choice, but if your corn head auger height is adjustable, I like to raise the auger to just more than the thickness of a ear (with the kernels on).  I like to see ears pushing ears in the auger trough.  A lot of kernel damage can occur if the flighting is peeling the top two or three rows of kernels in half as the ear is delivered to the feeder opening  (this can occur in very dry corn or very wet corn).  Make sure the auger is positioned as rearward as possible (near the stripper plate).

-Hard Thresh Soybeans:    1. Make sure the physics of the combine are right.  The concaves must be level to the rotor and zero adjusted.  The pinch point must also be right.  On the newer 88 series, the pinch point should be 11 to 12 bars down from the left (crossbars of concave).  It is also known as the 7:30 position as if looking from the back to forward.  On flagship combines, the pinch point is at the 6:00 position and maybe 1 bar to the left of bottom 6:00 o’clock position.  2.  Another trick is to use 1 small wire concave.  On 88 series, you can put it in the very front followed by the two normal large wire concaves.  On flagship, you can install a small wire in number 1 right position.  This will help in getting out those very hard to thresh pods.  3.  Go to the settings tab on this website to review the cheat sheet settings for soybeans.  Adjust to your variety.

-Side  Work Lights (lights mounted on mirrors): I want to turn on the side work lights for harvesting during the night – How do I turn them on?  The side work lights can be turn on for night harvest.  Simply make sure your main lighting rocker switch is in the field mode position.  Then, simply move the turn signal switch momentarily up or down and back to neutral.  Moving the turn signal as in a right turn momentarily and back to neutral will turn on the right light.  Moving the turn signal to momentarily to left turn and back to neutral will turn on the left light.  (new 88 series and 20 series.)

-Corn Head Question:  How do I prevent green sticky leaves from coming into the combine?  Here are a few items that can help.  1.  Stagger your gathering chain paddles.  In other words, run a off set pattern with the gathering chain paddles.  2.  Make sure the corn head angle is correct.  In cutting position, the angle measured on the stripper plates should be 23 degrees. (use a angle finder).  If you run to flat angle, you will increase the amount of leaf material.  3.  Check your stripper plate dimensions.  The opening gap should be 1/8 inch wider in the back of the stripper plates versus the front.  The fixed side stripper plate has slots for adjustment – I use sockets that are 1/8 inch difference for measuring tools.  4.  Know how to adjust your hydraulic deck plates.  Once you see excessive material and upper stalk coming in, back your setting off a little.

-Front Feeder Drum Rings:  There is now a new feeder drum that has rings welded to it.  This will aid in providing even greater slat strength. This went into production at YAG003193 (Jan, 2010).  If you would like to add the rings to a prior 5088, 6088,7088, there is a parts kit available.  It is  P/N 84230830.  There is also a kit available for the prior 7120, 8120 and 9120 combines it is Drum Ring kit P/N 84482583.  The feeder chain used with the new ring is the “U” shape style.  The earlier “Z” style chain will not work as the slats would have contact with the rings.


-Pro 600 for 2011 Combines:
Case IH will continue to use the Pro 600 in 2011 model year combines.  As many of you know, the Pro 700 has been released for some other products (such as tractors).  On combines, the Pro 700 release is currently set for Oct 1, 2011. The pro700 software required for combines is planned to be ready for Oct 1, 2011 production.

-8120 Horse Power: Just a reminder that the new horse power for a 8120 does not quite match the brochure.  The 8120 has 420 base HP and 480 Peak HP. This was changed last fall.  The combine brochure shows 420 HP and 463 HP peak.  The growth HP was increased to 60HP and the torque curve was improved.   Be sure to use the new numbers when referencing a new 8120.  (The early build 8120’s can be loaded by your Case IH dealer service technicians with the new engine dataset software to bring to the new HP levels. Contact your Case IH dealer for details.)

-Combine Calibrations: There are a number of calibrations that can be done with combines to make sure the displays and operations are correct.  The plant does a pretty good job of setting these up at the factory. If you ever feel that something is not quite right or set right, don’t be afraid to re do the calibration:  **For example, a number of things can be calibrated in the new 88 series using the “A Post”.  They are:  Concaves, Tailings Volume, Header Height, Header Tilt, Upper Sieve, Lower Sieve, and Reel Drive.  I suggest using the operators manual (Section 6 under working operations-starting on about page 20) in conjunction with the “A Post”.   **On the 20 series there are also a number of things that you can calibrate if you feel something is not operating as it should.  These calibrations can be done in the Pro600 under the calibrations icon.  For the 20 Series, they are:  Feeder Height, Tire Radius, Multi-Function Handle (MFH), Concave position, Groundspeed  hydrostat, MFH Neutral Switch, CVT Rotor, CVT Feeder, Upper Sieve, Lower Sieve, and Self-leveling Shoe.  The nice thing on the 20 series with the Pro600, the windows will come up to explain the calibration process for each item.  You can also reference the ops manual in section 6.

-Automatic Height Control Tip for 10, 20 and 88 series: If you every run into a situation where the automatic height control does not work, here is some easy steps to try that works most of the time, and gets you up and running.  Item 1:  First, clear the auto height preset memory by raising the feeder all the way up and with the feeder and the separator running, press preset 1 and 2.  This will clear the preset memories.  Item 2:  Second, redo the header quick calibration.  Turn the feeder and separator off.  Lower the head all the way to the ground and hold the down button for 3 seconds.  Then press and hold the up button.  The feeder should raise to the point that the ground sensors are off the ground, pause and record the upper voltage and then raise completely (you keep holding the up button the whole time until the head goes all the way up).   You have basically rebooted the auto height system, so give it a try if you every encounter this.  Then, go ahead and redo your ground presets.

-20 Series Feeder to Ground Speed Feature: 20 series combines have a feeder to ground speed option which is standard equipment.  It is similar to reel to ground speed.  This is a exclusive feature to Case IH 20 series combines.   There is a feeder option for Auto Operation. The feeder ratio to ground speed can be set by the operator to a specific ratio. In the Pro600, go to screen > Main>Toolbox>Feeder tab to set.  Auto operation requires that a minimum and maximum feeder speed be configured and placing the feeder auto mode rocker switch in the “AUTO” position. The feeder speed will be at minimum until the ground speed exceeds the minimum preset, will then vary as a function of ground speed while below the maximum preset and will be at maximum should ground speed exceed the maximum limit. The feeder requested ratio to ground speed will be maintained, regardless of the engine speed. These settings are header sensitive.  The header drive operating range at high idle is 460-698 RPM (jackshaft speed).   AND, if course, you can use the Manual method on the right hand console.
Information notes:
Corn and Pickup headers: Feeder jackshaft speed range is 460 – 690 RPM.  It is recommended that a 2600 Case IH chopping head be run at 575 RPM.
Grain Auger Heads: Feeder jackshaft speed range is 460 – 690 RPM.
Draper Headers: Draper heads will run at a fixed speed of 570 RPM.

-Grain in Fan?: Once in awhile we hear of someone who gets grain in the fan.  The root cause is usually that the pre-sieve is too far open.  However, another consideration is the speed of the clean grain system.  If you are in a high volume crop such as corn, you may at times have instantaneous high bushels per hour.  Make sure the clean grain elevator system is set to the high side for high yielding crops.  For example, if the grain elevator system is on the low side, the clean grain auger at the bottom of the sieves cannot take the grain away fast enough for those instantaneous  high yielding parts of the field.  Then, the auger may fill for short periods of time and grain can overflow into the fan area.  The Axial Flow combines can really rock and roll, so make sure they are set for the crop you are harvesting.   Be sure to recalibrate yield monitor if you change elevator speeds.  Below is some information on clean grain elevator speeds.

-88 Series Clean Grain Elevator Speeds: The 88 series has a two speed clean grain elevator.  For high yielding crops such as Corn, it is suggested to use the high speed.  There are two sprockets on the elevator drive (right side of combine).  The 25 tooth sprocket will drive the elevator chain at 400 fpm, and is intended for normal operation. The 30 tooth sprocket will drive the elevator chain at 500 fpm, and is intended for high yielding corn crops.  Move to the bigger drive sprocket to get the high speed for the elevator.  You will be able to handle corn at upwards of 3400-3500 bushels per hour.  Remember to recalibrate the AFS System when changing the elevator sprockets!

-20 Series Clean Grain Elevator Speeds: The 20 series corn machines have two speed elevator drive.  (A two speed option is available for machine shipped with single speed such as wheat machines.)  If you plan to be harvesting at a rate of 4300 bushels per hours or more, it is suggested to move the high speed.

-2600 Corn head Speed on 88 Series: If you have the optional 2 speed feeder drive on a 88 series and running a Case IH 2600 Chopping head on a 88 Series, be sure to use the regular speed (low speed) of the 2 speed feeder option.  That will turn the head plenty fast.  If you use high speed, you will over speed the chopping knives.  Info note: At 2410 RPM Engine speed with feeder in regular (Low) speed, the Feeder shaft speed is 593 RPM.   At the optional high speed, the feeder shaft turns at 682 RPM – that is nice for a non-chopping head if you need to harvest and faster MPH speeds, but not a chopping corn head as it already runs fast enough.  By the way, if you run a Case IH draper head on a 88 series, also use the regular (low) speed of the feeder drive.

-Grain Quality: One of the basic fundamentals of a Axial Flow combine is grain quality.  No other brand come close!  However, we would like to bring up three points when it comes to evaluating kernel damage relating to Corn.  Some operators believe that when they see kernel damage in the grain tank, that it was caused by the rotor.  Contrary to belief, that is not true. The axial flow rotor is very gentle on the grain and is not likely the cause kernel damage unless it is so badly set (such as concaves set too wide/or way to close, or excessive rotor speed).  Here are three areas to consider when evaluating corn kernel damage:  1. Cornhead Auger setting should be considered. If the auger is set to low, the flighting can peel or cut the kernels right in half, especially in wetter moisture levels. If you are a fanatic about kernel damage, here is a recommendation about auger heights:  With the newer Case IH corn heads, we have the option to adjust the auger flight off the bottom of the auger trough so as to have a layer of ears “still” left in the auger trough after the corn head comes out of the standing corn.  This is so as not to allow the  auger flight to slice into the ear of corn, causing crown damage as the ear is transported to the feeder housing.  If the corn head is being operated in commercial size ears, the auger could be as much as 2.25″ to 2.5″ of the bottom of the auger trough.  Whereas, with popcorn, the auger might be 1.75″ to 2″ off the bottom of the auger trough.  2. Watch excessive tailing levels. As you know, anything that goes through the tailings will get threshed again, and perhaps add to kernel damage.  As a rule of thumb, you should not see more than a 1/3 of a auger of tailings.  If you have more than this, make a sieve/fan adjustment to keep tailing low.  3.  Check the clean grain elevator chain. If the chain becomes too loose, the rubber paddles will bend over more, and any kernels trapped between the elevator housing and a loose paddle may encounter damage.  Watch and control the above items and you will have the best grain quality around!

-Soybean Productivity tip: For really hard thresh soybeans (tough green small pods), some folks like to use a small wire concave.  With Midrange combines, use a small wire concave in the #1 position with the other two concaves being large wires.  In Flagship combines, some folks will use a small wire concave in #1R position and the rest large wires.  This is a good little tip for those really hard thresh situations.  Also, be sure your concaves are zeroed and level to the rotor.  The physics need to be right.

-Manual Adjustable Residue Deflector Kit: An adjustable deflector is available as a dealer installed kit (part number 87328003) for 20 Series combines.  This  kit is used where you may have wet damp straw or damp soybean straw loading on the right side of the rotor and notice more residue on the right side than the left side.  It goes on the right hand side between the back of the rotor and the chopper.  The deflector is adjustable, allowing you to better direct straw through the chopper and to the spreaders.   (In order to get more even spread pattern from right to left side.)   The kit is available for machines  after serial number HAJ202001.  20 series combines equipped with the Magna cut chopper have this as standard equipment.  In normal straw moisture conditions, the residue can be managed very nicely without it.  However, for those folks that may have to  combine in extreme tough straw conditions and want the ultimate residue management spreading, see your Case IH dealer about this kit.  It’s pretty easy to put in too! (provided it is after above serial number.)


-Pre-Sieve or Front Sieve Section Adjustment: The 10 and 20 series combines have a pre-sieve, and the 88 series (along with legacy combines-1600/2100/2300/2500) have a independent front section on the top sieve.  We sometimes, also, refer to this as the pre-sieve.  Here is a good rule of thumb for adjustment: The front section or pre-sieve should be open half the distance of what the main chaffer sieve is.  Some folks will say that the pre-sieve louvers should be open to the thickness of the seed you are harvesting. Anyway, if you ever experience grain in the fan area, the root cause is that the pre sieve or front section is too far open.  That is the general recommendation when the grain is fit.   However, the beauty of the adjustable pre-sieve is that when the grain is very wet, you can open it more. For example-wet corn wants to flow over itself -that might be a condition to open the pre sieve a bit more than suggested above.  There is a lot of sieves in a Axial Flow.  Think about getting 15% of the grain through the pre-sieve, and use the long main sieves for the rest.  You will then get along great, and have a super sample!

-88 Series Combine and Pro 600 training Tutorials and “A” Post Training: There is a website that has a series of tutorial videos where you can learn on how to use the Pro600 in a  5088, 6088, or 7088.  You can learn on header setup, combine setup, distance calibration, moisture sensor calibration, and yield sensor calibration.  The Website is part of the Case IH AFS site.  Here is the website: http://www.caseihafs.com/tutorials.php When it come to leaning how to use the new “A post”, there is a training video DVD.  It is DVD10919.  It is available through your Case IH dealer.  This training video will show your operators all the functionality of the new “A Post”.

-20 Series Pro 600 training and RH Controls Training: There is also a training video for this.  It is DVD10900 (also available through your Case IH dealer).  This training video shows how to use all the screens on a Pro 600 and how to use all the switches in the right hand console.   Do your new Flagship combine operators a favor and get them this training video!

-Engine Speed Alarm on 10 and 20 series: Some of the folks are in real good high yielding wheat right now.  If your engine alarm is coming on more often than you what, one of the things you can do is reset the setting for engine speed alarm.  As long as you have a good ear for your machine, you can try resetting it down to 1950 rpm setting.  (factory setting is 2050 rpm alarm setting.)   Of course, we do not want to slug the machine, so that is why we say, you should have a good ear for your machine.  The engines will pull pretty good!   The max you can set the engine speed alarm down to is 1900.  To Set:  Go to “Toolbox”, than “Engine tab”, then scroll down to “engine low speed alarm” setting and put in your new number (such as 1950).

-Know your Physics: This is pretty basic information, but it doesn’t hurt to double checked  combines before the season.  Make sure the concave is level to the rotor.  In other words, the concave need to be parallel to the rotor.  Also, make sure the concaves are “zero” adjusted.  If you have these basic physics right, you will avoid a lot of threshing issues.  See your operators manual if you need instructions on how to do it.  You will have enhanced performance as the Axial Flow was designed for.

-Know your Angles: As we start to get ready for the harvest season, here are a few Angles that you should know for best performance. We usually like to see a positive Keel Angle (back of combine higher than the front of the combine).  The back can be higher, but should not be higher than 3.5 to 4 degrees. (1 to 3 degrees in nice.)  Measure on the main frame of the combine.  Head Angles: 1020 head should have a 10 degree forward angle.  Measure this on the vertical back of the head when it is in cutting position.  On a 2020 head, it is 17 degrees forward angle in cutting position.   On the new 3020 head, the back sheet angle should be 15 to 16 degrees.  As for corn heads, when the head is in cutting position, the angle should be 23 degrees measured on the deck plates.  These angles don’t have to be exact, but should be in the neighborhood to give the best performance and the least amount of head lost.  As for the 2162 draper heads, they have a adjustable hyd. center link cylinder to adjust angle from the cab (on-the-go) for best performance.

-De-Slug Operation-Flagship: Do you know how to use the De-slug feature in a 20 series combine?  It is pretty simple:  1. Move separator switch to rearward position (let go and it will go back to neutral).  2. Then, Move the separator switch to the forward position. (you will notice that everything is running on the combine except the rotor.  The chopper is running, the sieves and the fan are running).  3.  Run engine at full throttle.  4. Use the rotor speed rocker switch.  “minus“ will back the rotor up and “plus” will turn the rotor forward/normal direction.   You can rock the rotor.  We usually say to back the rotor up just a little bit and the run it forward + .  Repeat as necessary to de-slug the rotor.   You may lower the concave slightly, but not too much minus.  Try a little reverse and then forward moving the slug to the rear.  We Want the Slug to go out the back of the machine!  Remember, that you can shift the rotor gear box to 1st gear for the most rotor rocking power!   Go out and try this on your machine in the yard ahead of time and learn how to do it.   Case IH is the only company to have this feature!Can you imagine the value?  If a operator slugs the machine, one can de-slug a flagship combine in short order.    Time is money- imagine not backing up your whole operation (truck, drying, tillage, ect) for the day!  In a 20 series Axial Flow, you can be cool and stay cool!

-88 Series Left hand access panel: Have you look at the left hand door on a new 88 series lately?   The rear left hand rotor access panel is now real easy to take off.  It has been formed with the bottom lip above the shaker arm.  You no longer have to play with it to get off due to shaker arm contact.  (March 2010)

-Combine and yield Monitor Tutorials for 2500 and the new 88 series combines: There is a website that has a series of tutorial videos where you learn (or your operator) on how to use the Pro600 in a  5088, 6088, or 7088.  You can learn on header setup, combine setup, distance calibration, moisture sensor calibration, and yield sensor calibration.  The Website is part of the Case IH AFS site.  Here is the Website:  http://www.caseihafs.com/tutorials.php Check it out!  These are some nice training videos.   (on another note, if you would like videos on how to use the controls and pro600 in a 10 or 20 series combine, see your Case IH dealer and request Training video “DVD10900”.   This dvd has all the training videos for the flagship Case IH combines.)

-Know your Tires: Looking for tire information and specs?   Here are a couple of websites on which you can put in the tires size and get a lot of information about a particular tire.  The one for firestone is:  http://www.firestoneag.com/search.asp (Go to the Tire Finder section of the web page.)         The one for Titan/Goodyear is: http://www.titanstore.com/search/ (Try the advance search on this web page)  Check it out!

Power Plug on 20 Series combine: Do you want to have “keyed” 12 volt power for a radio, TV, or whatever?  There is a power outlet on the left side of the keyswitch console that is available for auxiliary accessories. This port is rated up to 8 amps. The part number of the male connector for this port is 86508819.  Also, There is a cigarette lighter plug to the right side of the key switch console, and another cigarette plug between the seat and the instructional  seat.  (on 88 series, there is a cigarette plug next to the transmission shift range handle. Also, there is a lighter and ash tray accessory kit P/N-434227A – field installed.  It goes between the seat and the instructional seat.)

Unload Lengths from Center Line of Combine: The unload lengths for 2010 Case Ih Combines will now be measured from the centerline of the combine to the inner edge of the discharge spout.

-RowGuide: The new RowGuide for cornheads is now available to order.  Please see your Case IH dealer if you are interested in this neat option.   The kits will then ship in the summer months.  The AFS RowGuide will be available to be installed on the new 88 series, and on model year 2006 and newer 10/20 series combines.  The combine must already have AccuGuide on it.  A pair of AFS RowGuide sensors, mounted on corn head dividers, follow a corn row and generate guidance input.  The AccuGuide system uses this input to keep the combine on-row.  The AccuGuide system helps maintain accurate automated guidance through areas of planter skip and across waterways.  Lands can be laid out, and it will stay on path if a row is missing, as long as there was a previous path to follow.  AFS RowGuide keeps the header aligned with the crop even on tight contours and curves.  It’s especially helpful in staying on-row in down and tangled corn.

-Class Size of combines for 2011 and prior Combines: Some folks have asked what determines the class size of a combine.  Believe it or not, it has nothing to do with productivity levels.  The one and only thing that determines what class a combine falls into is the horsepower rating.  The Ag Equipment Manufacturers association has designated the following class sizes:  Class 5 combines are 215 to 267 HP.  Class 6 combines are 268 to 322 HP.  Class 7 combines are 323 to 374 HP.  Class 8 is 375 HP to 410 HP, and Class 9 is 462+ HP.

Hopper Capacities: Please be aware that the combines still have the same hopper capacities as listed in 2009.  It does not matter if combine has standard or folding grain tank covers.

5088 has 250 bu. capacity
6088 and 7088 have 300 bu. capacity
7120 has 315 bu. capacity
8120 and 9120 has 350 bu. capacity

Unloading auger extensions:Here are the part numbers for the new 52 inch extensions released for 2010 combines.
If you would the 52 inch extension part number, they are:
P/N:  84261030 – for 52 inch Extended Wear
P/N:  84262399 – 52 inch Standard wear.

-2600 Hydraulic Powered End Dividers: Starting in 2010, the 2600 series chopping corn head can be ordered with the optional Hydaulically Driven end dividers (Spiral Augers).  There is a parts kit available in order to field fit a 2010 and newer 2600 series corn head.  It is 84339809.

-Sieves for General Purpose Machines: For areas with Corn, Soybeans and Wheat, If you would like the 7120, 8120 & 9120  to come with  1 1/8” pre-sieve with a 1 5/8” cloz slat top sieve,you can ordercode 425116 in the upper sieve area of the  price book.  There is no charge for this option.  (Normally, you would order 1 1/8 pre sieve and 1 1/8 upper sieve for just wheat, or 1 5/8 pre sieve and 1 5/8 corn slat upper sieve for corn/soybeans.)

-Full length slats for 10 Series Combines:Just for information, if you have someone that would like full length slates to tie all four feeder chains together, here are the part numbers.  (part number 87546907) for the feeder chains.  A complete feeder chain assembly that includes the full length slats is also available.

• Rock trap equipped – Part number 87625520
• Non-rock trap equipped – Part number 87625521

-Air Compressor option:Don’t forget that there is a  air compressor option on the 2010 models.   The system has the following specifications:

•8.3 bar (120 psi) regulated pressure
•60 L (16 gal) tank
•198 lpm (7 cfm) @ 1000 rpm / 396 lpm (14 cfm) @ 2000 rpm
•Self coiling air hose –6 m (20 ft) usable length
•An air nozzle will be provided to utilize with the self coiling air hose and the various outlets.

– 2020 Platforms: Effective with PIN Y9ZL52001 the 3rd stripper (which was available as a field installed attachment) is standard equipment on all 2020 and 2010 platforms. The stripper keeps the crop ahead of the auger and helps with some of the bunching and material coming around the auger before it gets to the feeder we were seeing in certain conditions with these platforms.

-Beacons: When you order a 88 Series combines, you will notice that Beacons are now standard equipment.  (This includes the second bin level sensor with two rotating beacons.)   You can deduct this out if you do not want.

-AFS Desktop Software: This has also become standard equipment.  You can deduct for it if you like.  We encourage customers to  enrolled in the desktop software support and maintenance program.   For a small yearly fee, customer get free software support plus free software upgrades and do not need to buy the expensive software when there is a update.  The current desktop software is version 10.0.  http://www.caseihafs.com/desktop-software.php

-Other 88 Series Items:A lot of other items are now considered standard equipment such as Radio, Antenna mount, under panel service lights, Auto Crop Settings, Engine block heater, and other common items.    They can be deducted, if so desired.

-Cold weather starting tip: On the 20 series combines – activate the grid heater by turning the key to the on position.  If the cold start pre-heater is active, a tone will sound when the key is turned on. The tone will change pitch when pre-heater has reached working temperature. Wait for the pitch change before attempting to start the engine.  Repeat if needed.    On 88 Series combines – Turn the key to the on position.  You will see a grid heater lamp on the “A” post.  It will be “on” in the lower left hand corner of  all the lamp indicators.  Wait for it to go out and then start.  Repeat if needed.   DO NOT USE ETHER!